
With HandyMan on vacation this week, much progress has been made on renovating
the laundry room. We're using Ikea for the cabinetry but, as with most of the
Ikea we've used in our home, we like it to look built-in rather than
freestanding.
Anything "built-in" such as built-in bookcases in a library, a built-in closet in a primary bedroom, or built-in pantry shelves feels more custom and suited to your particular needs. Built-ins feel high quality and long-lasting and adding this detail will make your IKEA cabinets look expensive instead of a budget buy.
So how do you make IKEA cabinets look built in?
The easiest way to make IKEA look built in is to install a filler panel between or around your IKEA cabinets. IKEA filler panels will take your cabinetry from looking off the shelf to looking custom made for your space.

How to Make IKEA PAX Look Built In
Filler panels are typically used with kitchen cabinetry. You most
commonly see filler panels used at the ends of cabinetry, to hide gaps
between the cabinet and the wall, or at the tops of cabinets to hide gaps
to the ceiling.
Similarly, you can use IKEA filler panels anywhere to give IKEA
freestanding cabinets a more custom look. I'll explain how to install
filler strips between IKEA cabinets and the wall. This simple IKEA PAX
hack can make IKEA look like an expensive solution, like we did with the
IKEA PAX cabinets
in our nursery.

We added DIY Ikea Pax filler panels beside and along the tops of the
cabinets and painted them the wall colour. You can install filler strips
between IKEA cabinets, or between IKEA cabinets and the wall, the process is
still the same. It's a small detail but one which creates a much more
finished and professional look. You can see what the nursery looked like
before
here.
We needed a similar solution for our laundry room where we were installing
IKEA SEKTION cabinets. Creating IKEA SEKTION filler panels would be just the
same.
How do you install IKEA filler panels around cabinets?
Installing a filler panel is not difficult and can be done by even a novice
DIYer. You can use this method to create filler panels for IKEA SEKTION
cabinets as well as for IKEA PAX. It doesn't have to be for IKEA either -
this DIY filler panel solution works for any project where you have a gap
between or around your cabinets.
1. Find your materials to make the filler. Measure and cut your filler.
IKEA sells various sizes of filler panels but sometimes you need to DIY your
panel. The IKEA As Is section is a good place to look if you can't find a
ready-made filler panel. You can make a filler out of things like toe kicks,
cover panels, or flat doors. But really you can use most any material, not
just IKEA, for your filler panel. We usually just dig into our MDF scraps to
make our fillers.
We planned to have this particular panel painted the same colour as the wall
so the texture and colour didn't matter. But if you prefer your filler be
visible and match the cabinet, then definitely use some thing from your same
IKEA system to make the filler piece.
2. Make the cleats.
A cleat is the supporting strip of wood that sits behind the filler panel.
It provides stability and something for the filler to adhere to. You need
two cleats: one attached to the side of the cabinet, and one attached to the
wall.
For our cleats, we used 1/2" thick pieces of wood. Measure the depth of your
filler panel (we used 1/2" MDF) and set the cleats that distance back from
the face of the cabinet. We used carpenter's glue to attach the cleat to the
wall and held it in place with painter's tape while the glue dried. You'll
also notice we have one cleat running horizontally. Since the underside of
this cabinet is visible, we needed to have a filler piece to hide the
underside of this gap as well.

3. Attach the filler panel to the cleat.
We also used carpenter's glue to adhere the filler to the cleat. The filler
likely won't be touched much so glue is strong enough for this application.
Nailing the filler to the cleat is not necessary but you can do that if you
prefer more stability.

4. Fill in any gaps with paintable caulk.
Oh, DAP, you hide so many secrets :) You don't need exceptional cutting skills to cut a filler panel that fits. Instead, just rely on caulking to hide the seams and any very small gaps. Choose a caulk that is paintable so you can match your walls and really ensure the filler looks built in.
You can also use caulk if your wall isn't perfectly straight. It gives a
seamless, clean look.

And that's all you need to do to make your IKEA cabinets look built
in.
If you notice, we also have a filler panel running along the tops of the
cabinets, to hide the gap to the ceiling. Without the filler panels, these
IKEA cabinets would seem like they're 'floating' but now they feel more
substantial and built in. It's amazing how such a small detail can enhance
the look and feel of a room.

***
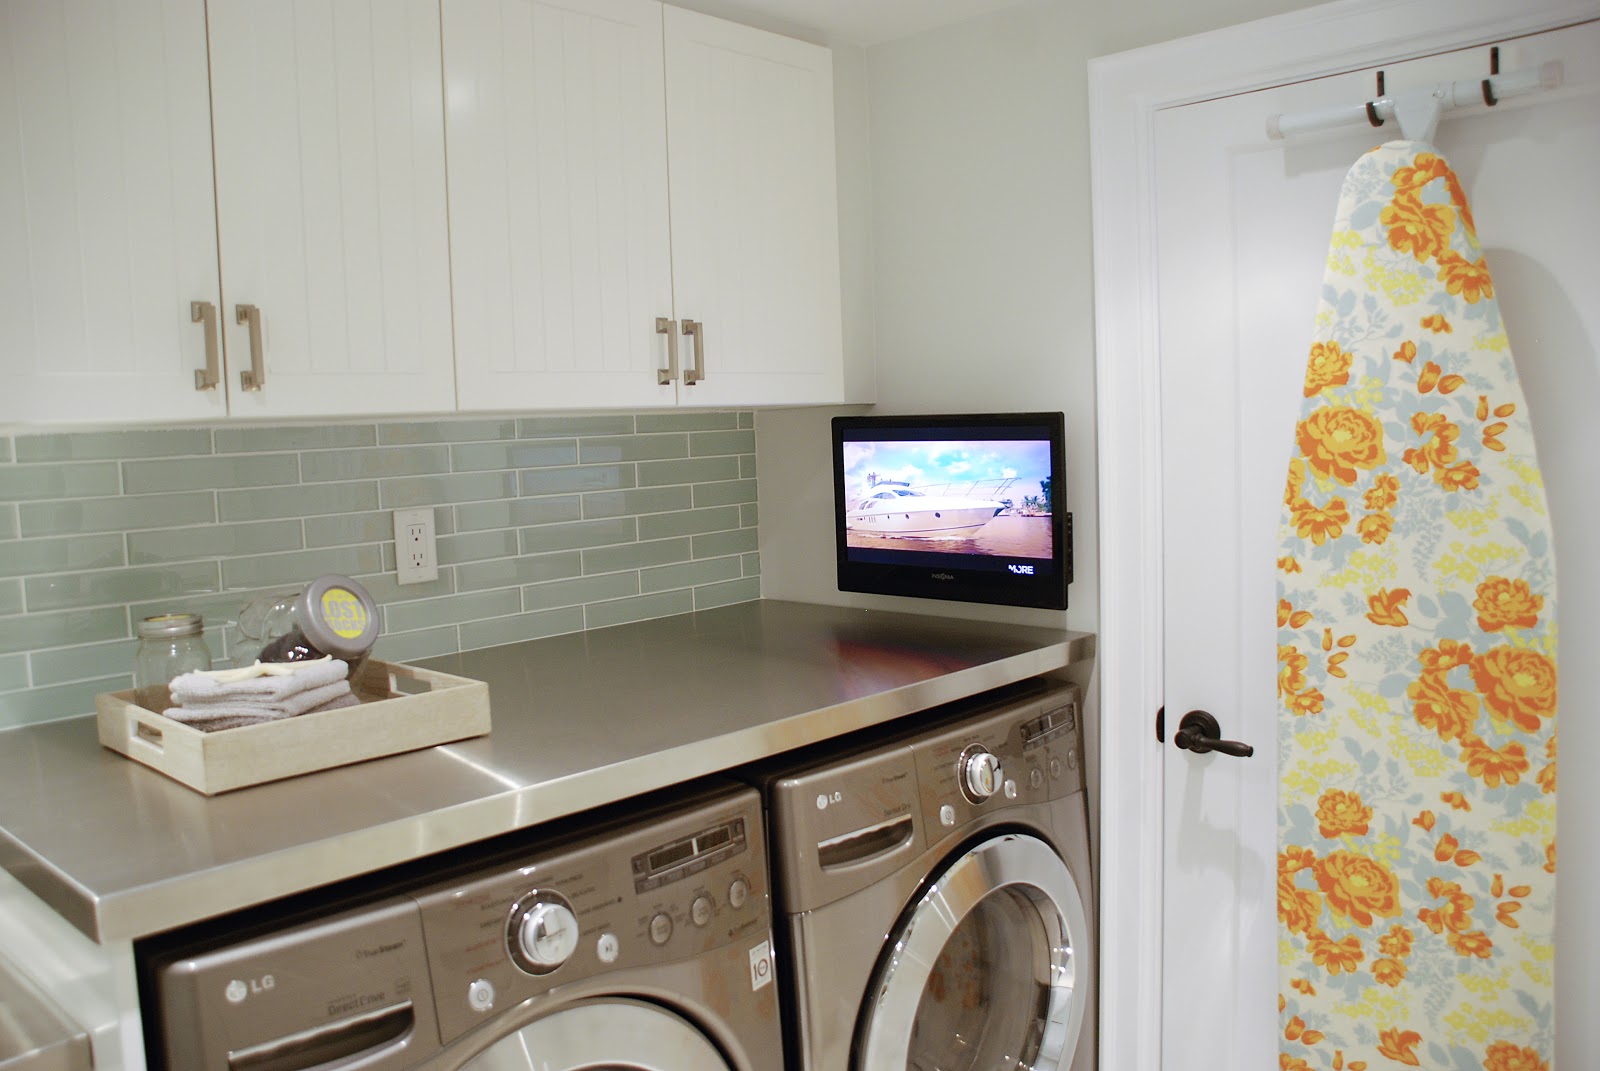
Update:
Click on over
to see how the finished laundry room turned out!
Once the rest of the room is complete, you can see how much the filler
panels contributed to the look and feel of the laundry room.
Large gaps between the walls and cabinets are no longer visible and this modern laundry room feels complete and well thought out. Consider adding filler panels to your next cabinetry project!


2 comments